Astro Photography Which is best

Over the years I have learned that when it comes to telescopes, there are various types to choose from, each with its unique set of advantages and disadvantages. Two popular telescope designs are the Newtonian telescope and the Maksutov-Cassegrain telescope. In this post, I thought it would be good to compare these two designs, visiting their differences and similarities to help you decide which one is best for your needs.

Newtonian Telescope

The Newtonian telescope was first invented by Sir Isaac Newton in 1668. It uses a concave primary mirror to reflect and gather light, which is then directed to a small flat secondary mirror mounted at a 45-degree angle. The secondary mirror reflects the light to the side of the telescope tube, where the observer views the image using an eyepiece.

One of the main advantages of a Newtonian telescope is that it is relatively easy and affordable to build. Because the primary mirror is the largest optical component in the telescope, Newtonian telescopes can be made with a large aperture (diameter of the mirror) at a lower cost compared to other telescope designs. Additionally, the open tube design of a Newtonian telescope makes it less prone to dew and thermal issues, allowing for better viewing conditions.

Maksutov-Cassegrain Telescope

The Maksutov-Cassegrain telescope was invented in the early 1940s by Russian optician Dmitri Dmitrievich Maksutov. It uses a combination of a spherical primary mirror and a meniscus corrector lens to correct spherical aberrations and gather light, which is then directed to a secondary mirror mounted at the end of the telescope tube. The secondary mirror reflects the light back through a hole in the primary mirror to an eyepiece located at the back of the telescope.  

One of the main advantages of a Maksutov-Cassegrain telescope is its compact size. The design of the corrector lens allows for a longer focal length in a shorter tube, resulting in a more portable and easy-to-use telescope. Additionally, the design of the Maksutov-Cassegrain telescope reduces the amount of light lost due to obstruction, resulting in a brighter image than a Newtonian telescope with a similar aperture.

So, which one is best?

Ultimately, the choice between a Newtonian telescope and a Maksutov-Cassegrain telescope will depend on your individual needs and preferences. If you are on a budget and want a larger aperture for deep-sky viewing, a Newtonian telescope may be the best choice. On the other hand, if portability and ease of use are your primary concerns, a Maksutov-Cassegrain telescope may be the better option.

In conclusion, both Newtonian and Maksutov-Cassegrain telescopes have their unique advantages and disadvantages. Consider what you want to observe and where you want to observe it, as well as your budget and level of experience, when choosing between these two designs. Whatever telescope you choose, remember that it is an investment in your stargazing journey, and with proper care and maintenance, it can provide you with years of enjoyment.

Read more →

The Amateur Backyard Astronomer

Exploration is a treasured activity of ours when we immerse ourselves in the great outdoors. Whether it be embarking on a journey, trekking through nature or simply taking a new path to see where it leads, the excitement of venturing into uncharted territory never fades. Another exhilarating experience we have discovered is gazing up at the night sky.

This is something we find captivating, and my wife's eagerness was palpable as she reached for our birding binoculars and glimpsed Jupiter's four largest moons for the first time - Callisto, Io, Europa and Ganymede. It's true that differentiating between the four moons can be challenging, as they are not always visible simultaneously, but with the aid of our favourite phone application "Stellarium," it's easy to locate and distinguish them.

The software and hardware we use to enhance our stargazing experience will be listed at the conclusion of this blog. While my eyesight may not be as sharp as my wife's, I can still discern one or two of the moons.

What's in the bag

So let's chat about the basics: What's in the bag etc. in this blog entry. I will just discuss shooting with the camera and we will visit the Celestron another time.

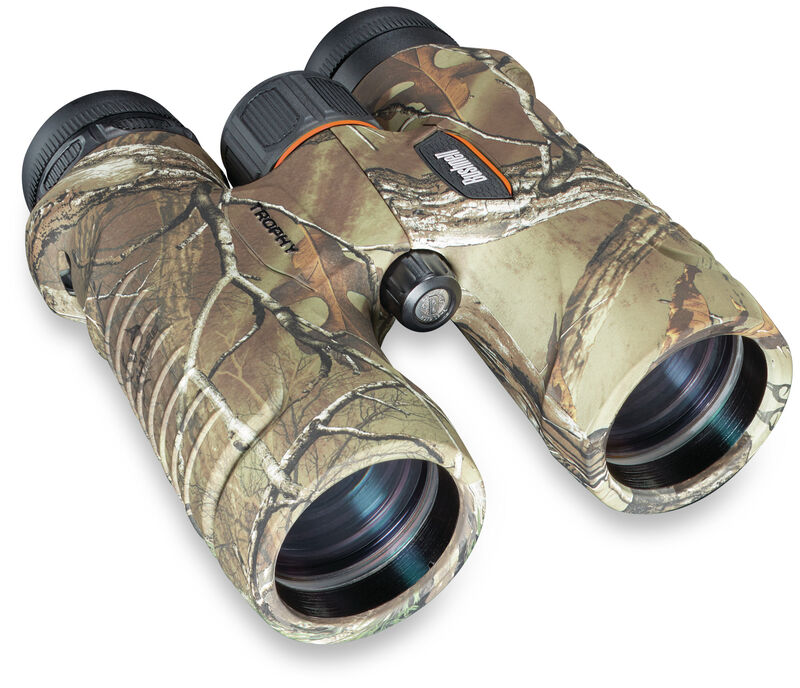
Binoculars. As I mentioned before our go to binoculars are the Bushnell Trophy  Realtree Xtra 10 x 42mm.

Camera. This one was easy for us as we have been photographers for many years and still had a lot of our equipment from our wedding photographer days.  For the stars though we used our Canon 5D MKIII and usually our Sigma 150-6700 mm lens.  If we are chasing the Milky Way then we will swap the zoom for our Sigma 1.4 24mm

Telescope. Our go to telescope is the Celestron 31051 AstroMaster 130EQ .   This particular one works equally well for daytime and nighttime viewing. It is easy to see the moons of Jupiter and the rings of Saturn with this one.  Of course any similar telescope will also do the trick.

Stellarium App.  We have been using this app on our phones for years.  It's simple to operate, will display exactly what you are looking at by just holding the phone in front of you, and best of all it's  FREE!  It shows a realistic sky in 3D --  just like what you see with the naked eye, binoculars or a telescope.  https://stellarium.org/

Telescope Camera Adapter.  These adapters allow you to attach your  EOS camera to the telescope with standard 1.25 inch Eyepiece Ports.  Basically you drop your telescope eye piece into it and connect it to your camera.  You then attach the whole unit into the telescope.

Tripod.  Any stable tripod will do, our go to to for many years has been Manfroto

Wireless Remote Shutter.  This is an important piece of equipment as camera shake is the enemy.  I set my camera up, hold my breath and fire the shutter through the remote.

Lightroom (Software). We have been using Lightroom for years as our go to software for post processing. It allows us to fine tune the images, remove a bit of noise etc.  We also have been using Capture One lately, but to be honest I still prefer Lightroom.  https://www.adobe.com/ca/products/photoshop-lightroom.html

What do we see

There is a plethora of celestial objects to observe using only binoculars and a camera, though visibility depends heavily on one's location and the degree of light pollution in the area. Fortunately, we are fortunate enough to have a deck that provides a clear view of both the Northern and Southern skies. However, being located near a city means that the lights can be a persistent hindrance. Nevertheless, we persevere, as even with the illumination, several moons and planets are often visible on most nights. Our location is on the 49th parallel in the Northern Hemisphere, and our observations are based on this.

The moon is an easy target for observation and photography, as long as it's visible. Let's discuss the image at the start of this blog for a moment. This photo was taken on July 29th, 2020, during a Waxing Gibbous phase at 80.25% full. With a little assistance from the website https://www.moonpage.com/, we can identify the various phases of the moon and even discover its phase on any specific date in the past or future.

When photographing bright objects like the moon, it's essential to switch to manual mode on the camera. For example, the moon is very bright, so a low ISO setting and a decent shutter speed are required. In this case, the settings used were 250/sec at f/6.3 and an ISO of 100. Being in manual mode allows for experimentation; you don't want the camera to do the thinking for you. Refer below for the equipment used to capture the image.

Additionally, it's crucial to remember that nothing is stationary in the sky. If you're taking photographs of stars or other objects, keep in mind that long exposures will cause them to move, so the length of time the shutter is open is critical. For example, if shooting with a wide-angle lens, a 20-second exposure is typically the maximum before star trails appear. My advice is to experiment and learn through trial and error.

Canon 5D mkIII Sigma 150 - 600mm lens and a Manfroto tripod.

The photos below are all from the Canon and Sigma 150-600 mm lens..  Saturn, Jupiter, Jupiter and 4 of its moons. 
The last image is from Stellarium and shows the names of the moons.

Next I think I will have a go at the Milky Way and Andromeda. This will need a dark sky and a much more advanced setup, so our back deck is not going to work.  Stay tuned and I will add more later.

Click here for most products mentioned above 

Read more →

Birding Binoculars

When choosing birding as a hobby there are a couple of things that you need right from the start.  Number one would have to be a love of birds and the outdoors. Of course, patience is a good virtue to have as well and I would say running a very close second would have to be a good pair of binoculars.  Agreed, binoculars are not 100% essential --  personally I often take my camera ahead of mine and some people use spotters -- but generally speaking a pair of binoculars would be right up there.

I like to speak from experience. My wife and I always go out together; she spots and I have the camera with the big lens.  Lately I will also be seen with the binoculars around my neck as well.  In the words of Sean O'Connell "If I like a moment, for me, personally, I don't like to have the distraction of the camera. I just want to stay in it."  It's those times when I put the camera down, grab the binoculars and just stay in the moment.

I'm not here to review binoculars as I don't have the technical skill set to do so but just like red wine, I know what I like.  I know what works for me, and that experience also extends to what happens if I break them.

Of course, we are also a store and as such promote certain products but as I said I will only blog about things I have first hand experience of. 

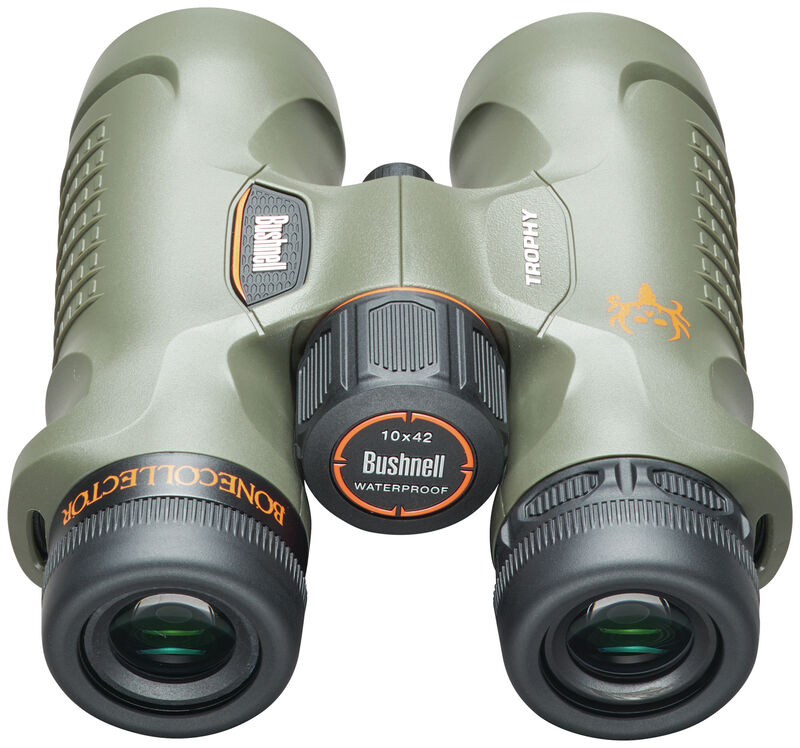
Our preferred lenses for our binoculars are 10 x 42. For those of you new to this, let me explain what that means.  It's quite simple really. The 10 simply means that a picture seen through the binocular lens will appear 10 times more magnified or closer than as you see it with your naked eye.  But what about the 42?  Well that refers to the lens diameter: in this case 42 mm.  When comparing binoculars think of the second number in terms of how much light is let in. Obviously a bigger number lets in more light but at a slight cost in weight and dollars of course.

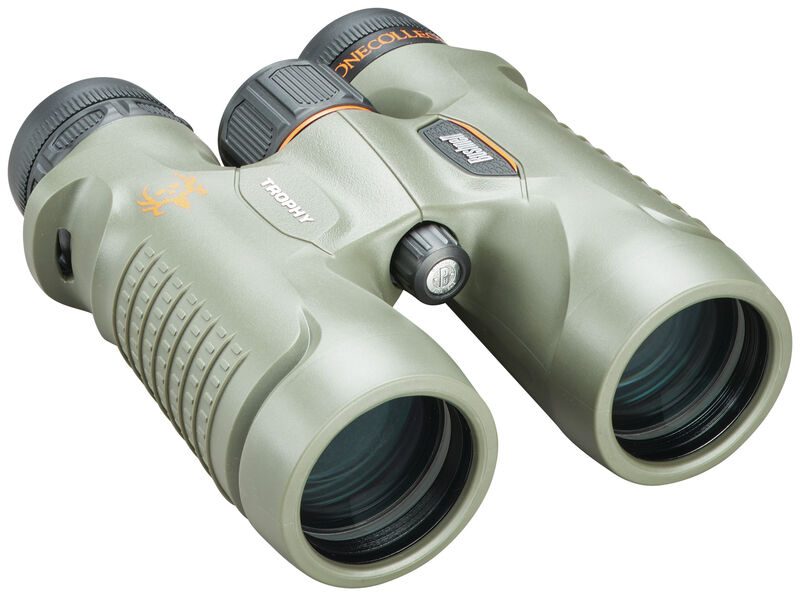
So enter stage left -- the Bushnell Trophy 10 x 42 waterproof binoculars.  


My wife was using hers for about a year before I decided to get a pair for me as well. I can honestly say that these binoculars are great.  They are armor-plated, waterproof, fog proof and super bright.  Is it sounding like an advert yet? Sorry but we really do love them.  Not that they are perfect. We have lost a couple of the covers: they fall off easily so we literally glued the strap to the body so we would stop losing them.

One of the cool things we are able to do (and this is not limited to Bushnell) is that with a steady hand you can take photos through the eyepiece with your smartphone.  It takes a little practice. An example is here...

As you can see, i'ts not bad and a useful trick for those days when you forget your camera or in my case here I forgot my memory card at home (again!)

But where we were really impressed and hence keep gushing about them is Bushnell's warranty.  A clip holding an eyepiece had broken -- nothing major but it was annoying.  Had a second one broke we would have been toast.  By now the binoculars were over two years old but we reached out to Bushnell anyway.  We were told that they come with a no question asked (no receipt required) warranty.  Just send them back and they would fix them for free.  So we sent it off. What Bushnell actually did was to send us a brand new pair. Incredible!!  We are now fans of Bushnell for life. How could we not be with service like that?  We have that piece of mind knowing that we are protected no matter what.


If you would like to be kept updated on new updates please sign up in the bottom right corner. 

Read more →

indoor garden

So, I have to confess something...I am NOT a green thumb. In fact, I'm more like a black thumb. If there's a plant that needs to be killed, I'm your guy. But don't worry, I'm not alone in this. My garden is filled with weeds and grass (which I'm surprisingly good at growing). I did manage to get some flowers in there, but let's be honest, it was by accident.

Now, I could have tried to grow some plants from seeds in the garden, but who am I kidding? I know myself too well. I would have given up after a few days when I didn't see any progress. So, instead, I turned to hydroponics. That's right, I'm going to be an indoor gardener!

It all started when we visited our daughter and son-in-law and saw their AeroGarden Harvest. It was like a plant paradise in their house. So, we did what anyone would do, we googled it. And let me tell you, it was a match made in gardening heaven.

This thing grows veggies, herbs, and flowers FIVE TIMES FASTER than soil. Plus, there's no mess because there's no soil! And get this, it has up to 12" of grow height, so you can even grow tomatoes! The best part? It's super easy to use. There's a control panel that reminds you when to add water and plant food.

And don't worry, everything you need is included. It's like a one-stop-shop for all your gardening needs. Oh, and did I mention that the electricity cost is only 85 cents a month? I could go on, but you get the idea. This thing is a game-changer.

So, we ordered our unit on Amazon (thank goodness for Prime) and it arrived in just a few days. We're excited to see what kind of plant magic we can make happen!


As we eagerly opened the box, we were delighted to find all the necessary equipment packed neatly inside. The star of the show, the AeroGarden Harvest, was nestled safely within the packaging. And that's not all - we were thrilled to discover a pack of 6 gourmet herbs, 6 plant holders and 6 covers all waiting for us inside. These covers looked like tiny futuristic spaceships, but we soon learned that they were in fact little incubation chambers for the plants. To top it all off, there was even an instruction manual and plant food included - we were all set!


Hold on to your hats folks, we have liftoff! The hydroponic garden is starting to grow! It's like watching a magical land of greenery come to life in our kitchen. The once barren unit is now filled with tiny sprouts of herbs reaching towards the light. We can't believe it actually worked!

It's been a week since we turned it on and we are already seeing results. The basil and thyme are growing like wildfire and the cilantro is not far behind. The parsley and chives are also making an appearance, but the dill seems to be taking its sweet time.

We are so excited to see what the next few weeks will bring. Who knows, maybe we will have a whole farm growing right in our kitchen. The future is looking bright (and very green)!


Who would have thought that we could become such successful gardeners? Well, not us! But with the power of hydroponics, we are now growing our own herbs and vegetables like a bunch of pros. We've got sprouts popping up left and right, and every day is a new adventure in our little indoor garden.

Our AeroGarden Harvest is the star of the show, with its high-tech control panel and fancy little plastic domes creating perfect little homes for our plants. And let's not forget about the crazy-bright light that makes us feel like we're living in a sci-fi movie.

Now, we're not saying that we're ready to start a farm or anything, but we're definitely feeling confident in our abilities to keep our little garden growing. Who knows, maybe we'll even start selling our produce and become the next big thing in the local farmer's market scene.

But for now, we're just enjoying the process and taking it one sprout at a time. Stay tuned for more updates as we continue our hydroponic journey and watch our plants grow bigger and bigger each day!

As promised, here are a few updates.

One week in

This next photo is after 3 weeks, from here on it's constant trimming and lots of fresh Basil etc.  It was amazing how quick and easy this was.


Click below for our current Hydroponic products


Read more →